
WHAT TO EXPECT
- You need to be present during your session. This means the session is live, not a series of documents being emailed back and forth. The tutor will invite you to a session.
- Currently, we can only serve students who book an appointment.
- Email your essay/assignment and any related documents (such as your teacher’s instructions and/or rubric) to your tutor in advance of the session. If you need help with sending a document, let the tutor know during the session. Then, the tutor may talk you through the process.
- This service and software is free for you to use. Minimal set up is required.
- You will be need to take your own notes. We suggest you do this on a printout of your assignment. You may also take screen shots if you feel comfortable with that method.
- The tutor may switch out to a view of their screen or a whiteboard.
- Audio and video are both recommended.
SETUP PRIOR TO TUTORING SESSION
You will want to relocate to an area that allows for some privacy while allowing for good Internet coverage.
It is highly recommended that you have a printout of your essay or assignment, or a notepad to take notes.
You will need to download the app on your Apple Device device. Go to the App Store. Search for and download “ZOOM Cloud Meetings app.”

JOINING YOUR TUTORING SESSION
You will receive in your MAC email account a link to “join” your virtual tutoring session. Click (or press) on the Join Zoom Meeting link at the top of the email message.

Afterwards, your device may ask you to select the appropriate app. Select the program called Zoom.
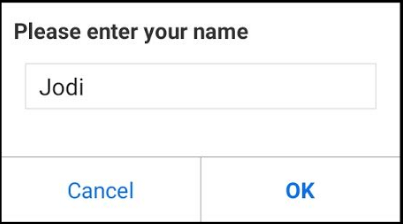
Next, you will be prompted to enter your name. Do so and click (or press) “OK.”
You may join a session early, but the host will activate the session when he or she starts the meeting. If your tutor is already in the session, you will see a live video of the tutor. Otherwise, you must wait until the tutor starts the session.
Once the session starts, at the bottom of your screen, you will see a navigation bar with several icons.

Click (or press) on “Join Audio” icon to join in with your device’s audio. This will create a bubble menu saying “Call via Device Audio.” Click on that message to start audio. 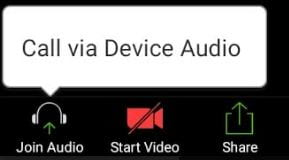
The “Join Audio” icon will change to the “Mute” icon, which means you are sharing your audio.
Next, you want to share your video through your device’s camera. To do this, click on “Start Video” icon to start sharing your video. You may stop sharing your video at any time. When you are not sharing video, you will see a red icon saying “Start Video” with a line through the image. When you are sharing video, the icon will say “Stop Video.”
TROUBLESHOOTING
- If you happen to have a slow connection, consider turning off video and relying instead on the audio and visual displays on the screen.
- If the navigation bar at the bottom of the Zoom program minimizes, you may access it again by clicking in any empty space (i.e., that is not an icon or the video).
- If you are having trouble getting the video or audio to work, try using the “Chat” function to contact your tutor, who should be able to help you figure out how to fix these issues.